Setup and Configure Tailwind CSS (and custom fonts) for a Drupal 10 local dev project

I am an enthusiastic, flexible front-end developer beginning my career in web and software development. I am currently employed as a digital apprentice in London working on a Drupal CMS site for website maintenance and feature development.
Non-tech previous work history: worked for design consultancies and a main contractor on ground engineering projects overseas and in UK.
Since December 2021, I completed a 12-week software development training course. The topics covered were: SDLC, foundation in HTML5, CSS3, JavaScript ES6, Python3, mySQL Workbench and MongoDB.
My system install at the time of implementation
Node v.19.6.1 and NPM v.9.4.0
Postcss version: "^8.4.21" installed as node module dev dependency
Tailwindcss version: "^3.2.7" installed as node module dev dependency
Drupal/core-recommended "^v.10.0" installed and use of DDEV development environment
Compilation of resources
Russell Jones has a Drupal 10 playlist where he goes through the general Drupal install process as well as setting up Tailwind, so you could just watch these videos and find what you need for your use case.
I wanted to test out DDEV for Drupal and found Russell's video to be effective. Docker is a prerequisite to using DDEV: follow the install instructions here.
General SO and google searching.
Install Tailwind CSS
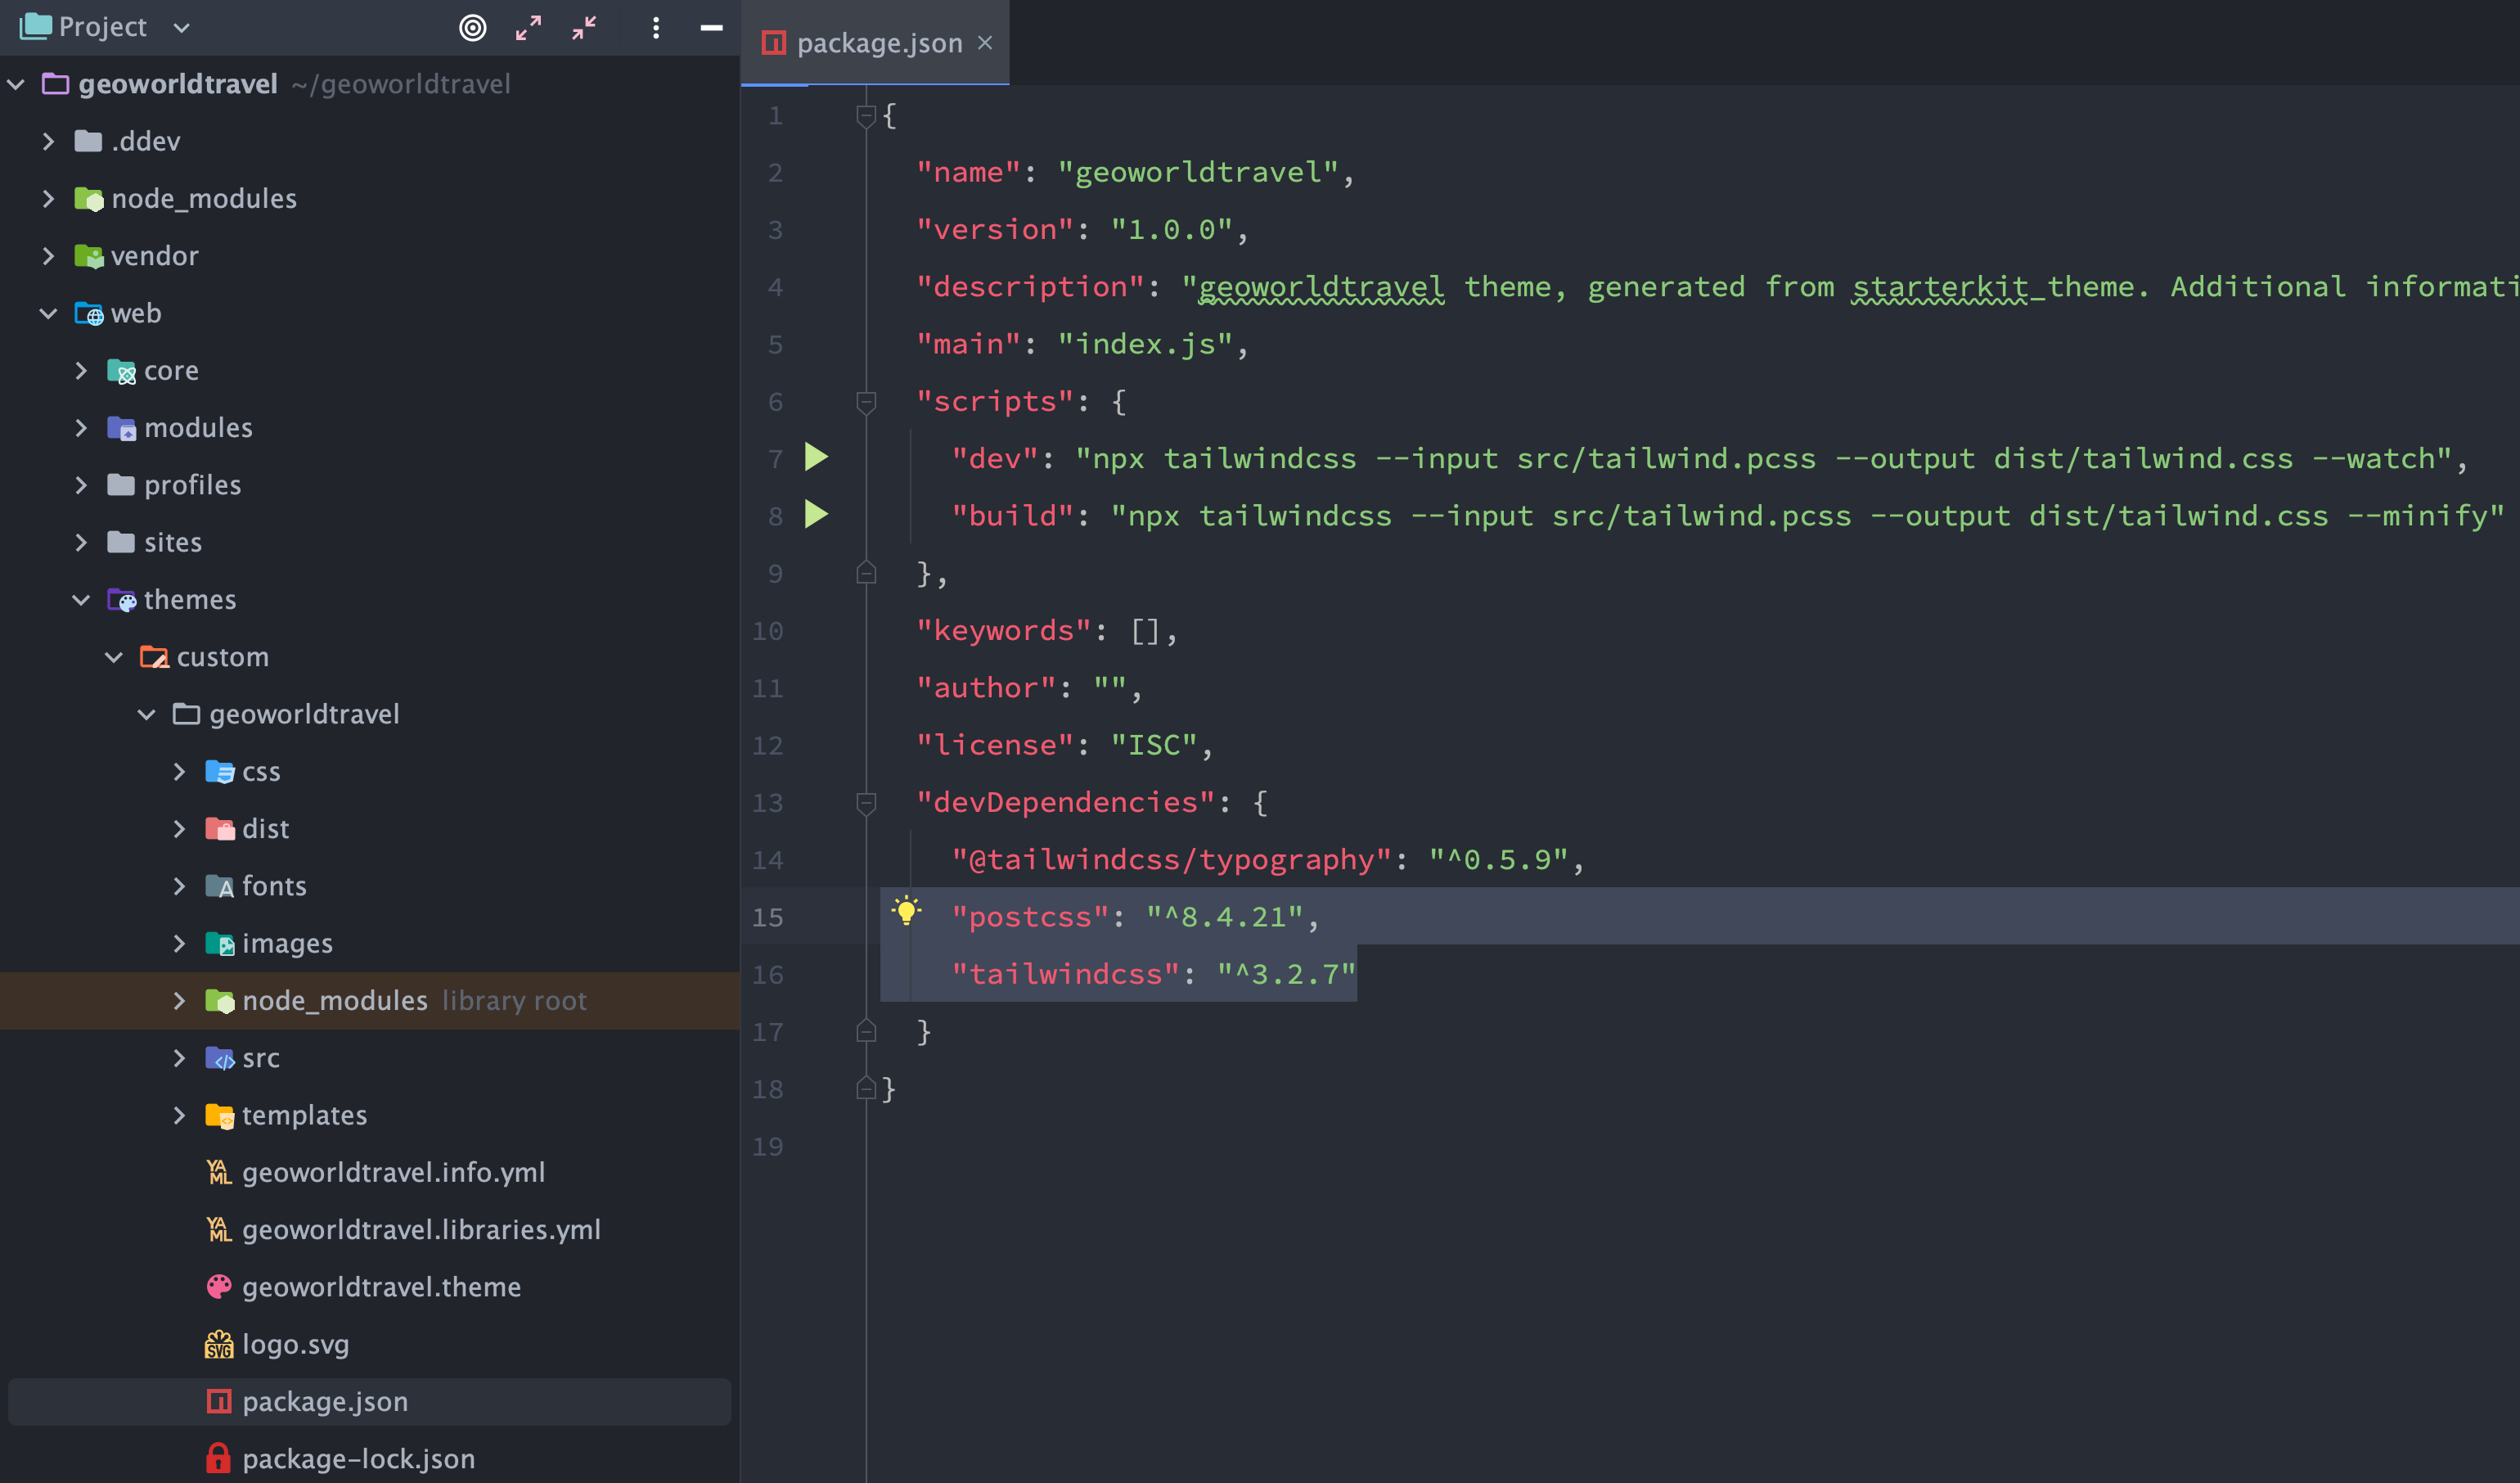
After installing your Drupal standard project via DDEV, following the Tailwind docs, in your terminal, cd (change-directory) into the root of your custom Drupal Theme directory. For example, in the screenshot below the root of the custom theme is geoworldtravel folder:
Install tailwind with the following commands:
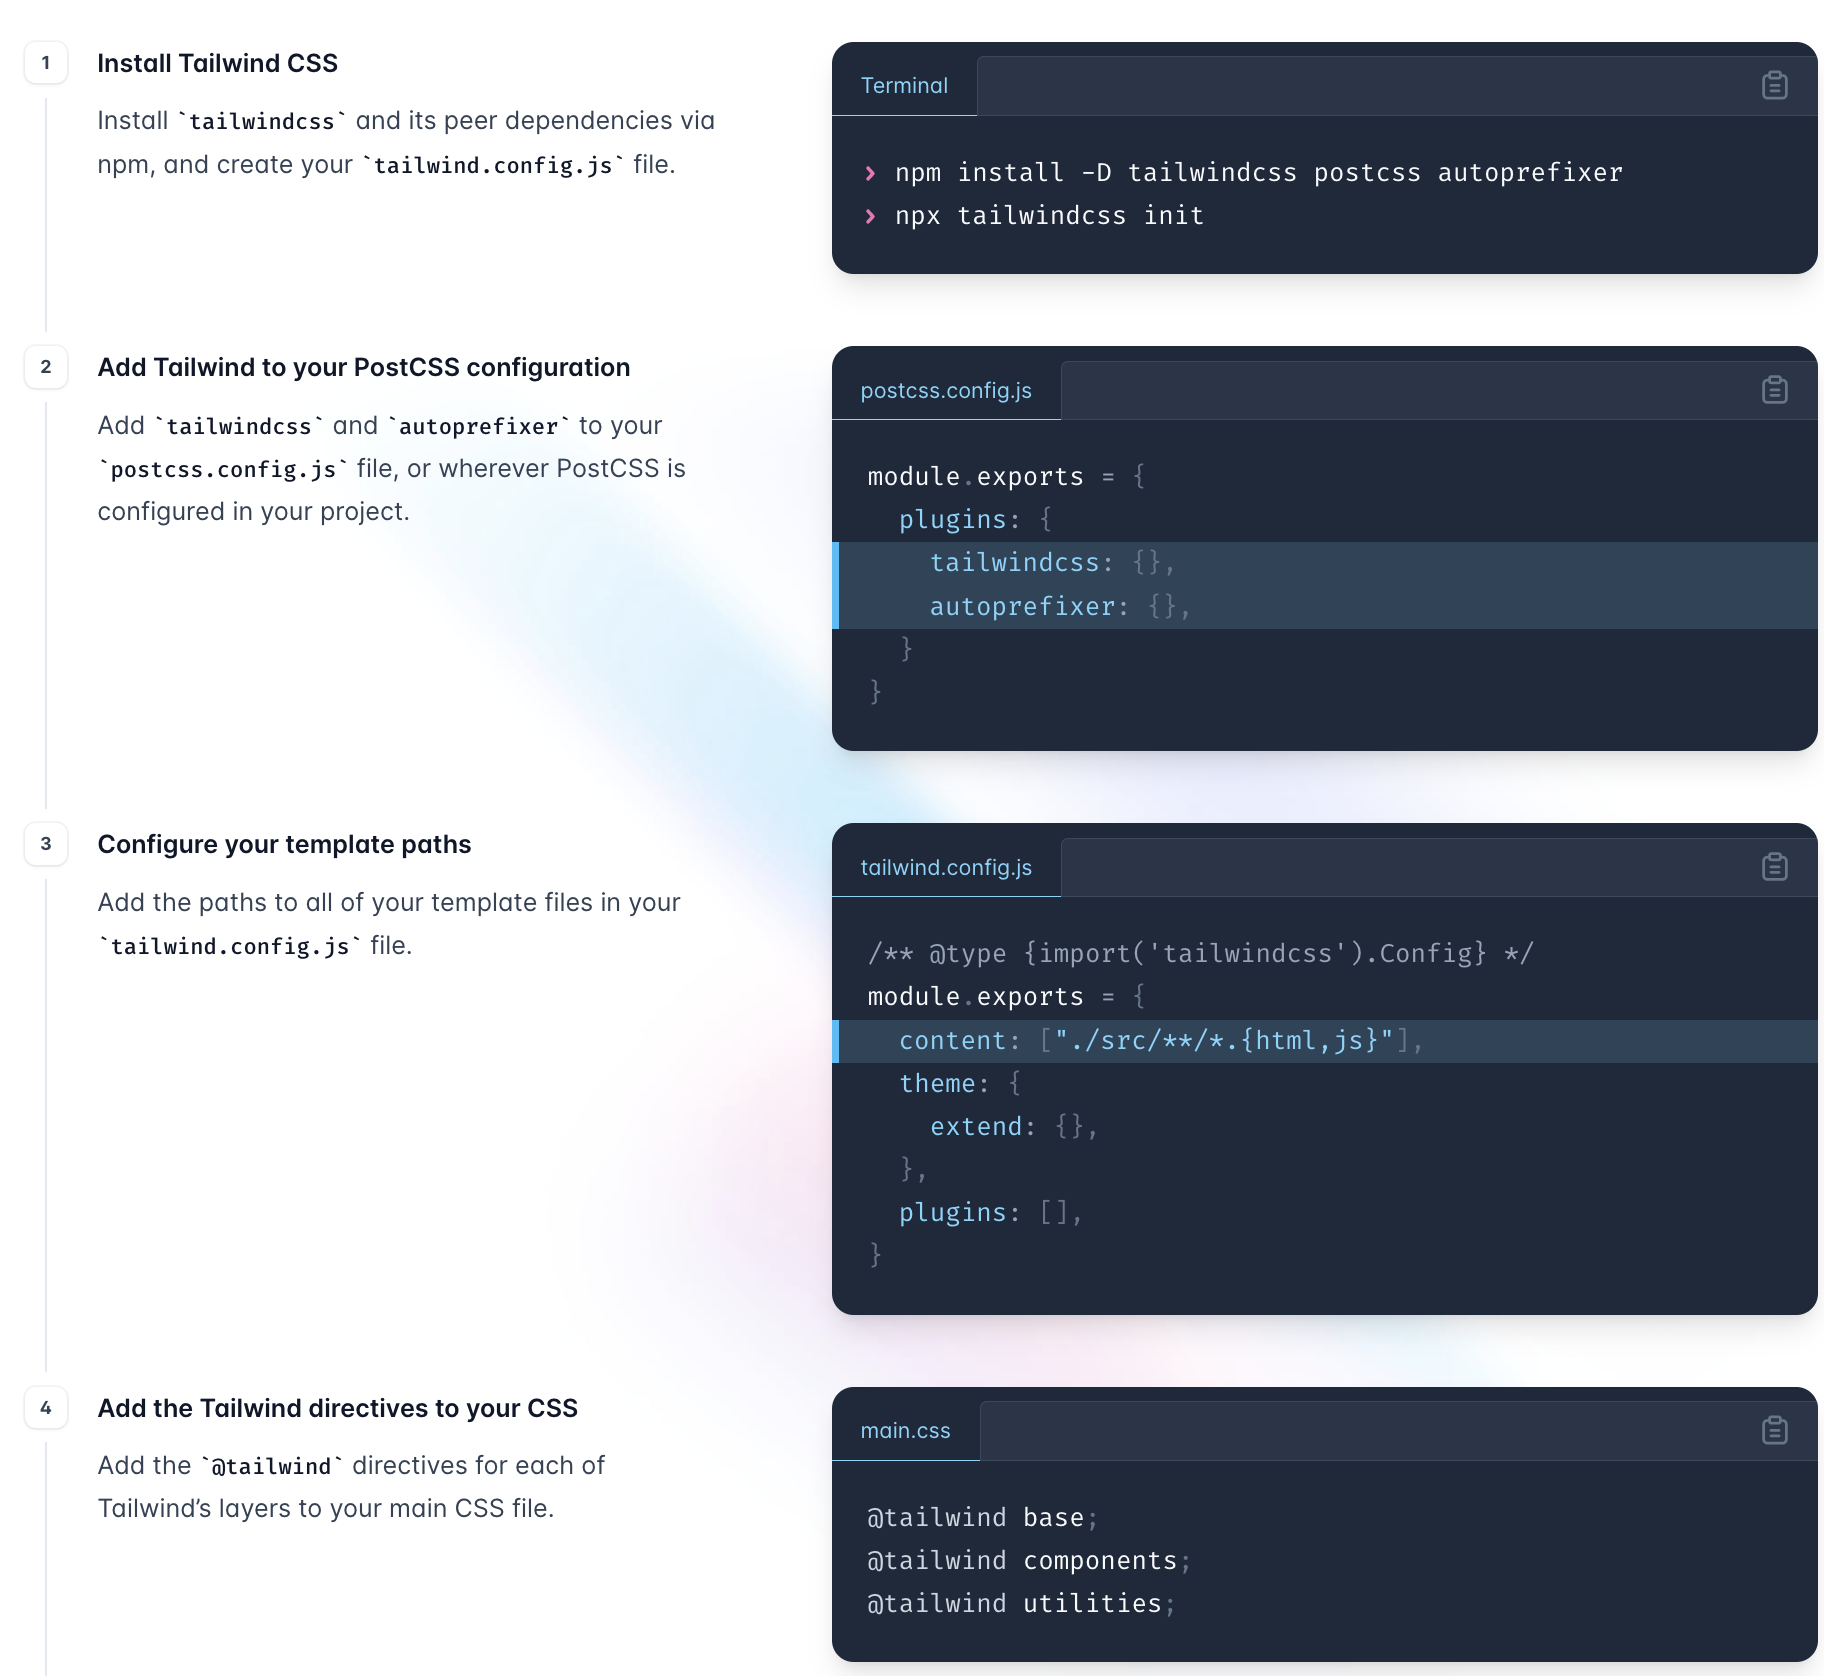
In Step 3 (Configure template paths), we need to adjust the content key-value pair to accommodate the twig templating engine that Drupal uses. I added this line in tailwind.config.js to catch any twig file that is within my templates theming folder:
content: ["./templates/**/*.html.twig"],
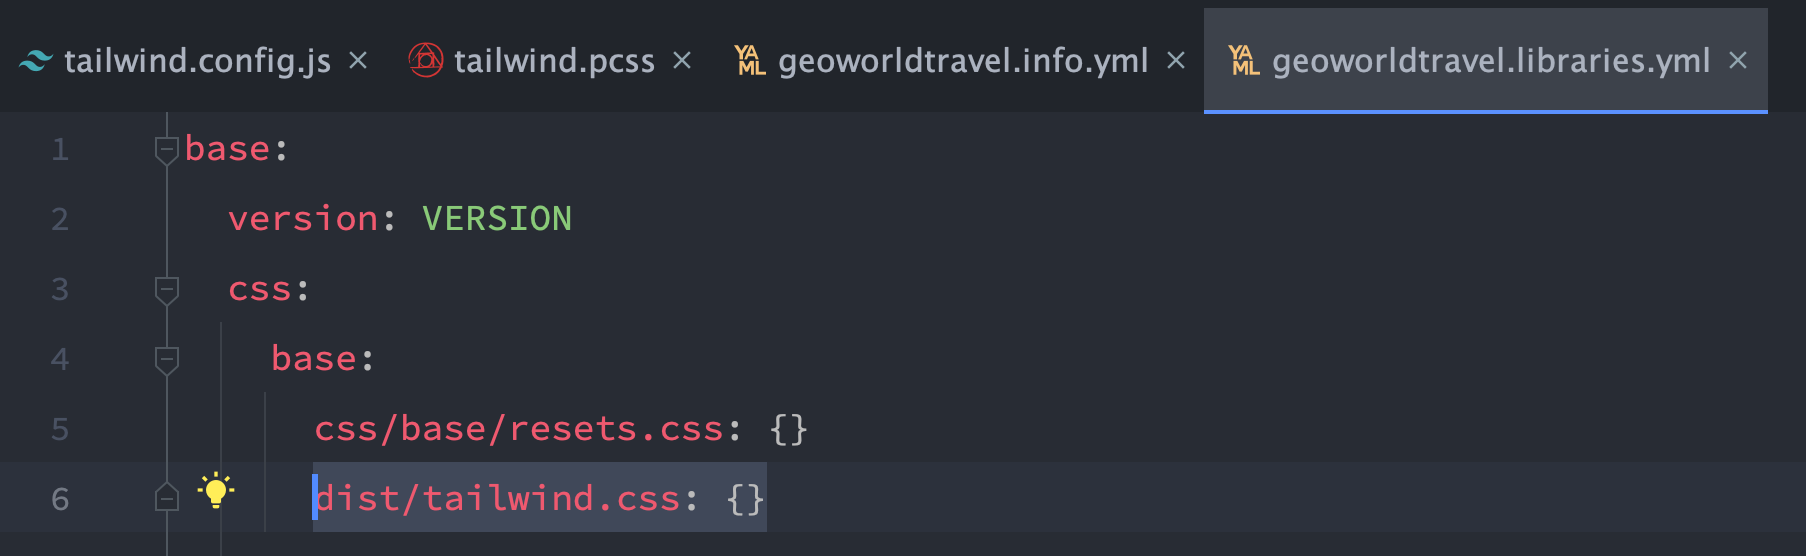
I created a distribution folder which tailwind will use to compile its utility classes from the twig files into a single native CSS file. Let Drupal know about its existence by configuring the "CUSTOMTHEMENAME.libraries.yml" file and providing a file path: base -> css -> base -> dist/tailwind.css: {}.
In the example below, the custom theme is called geoworldtravel. I set the stylesheet to the Drupal base layer in an effort to have the styles applied globally (you may find this effective or inappropriate, feel free to tweak these lines as you see fit):
In Step 4 (Add the Tailwind directives to your CSS), I adjusted this slightly to account for the CSS preprocessor. I created an 'src' folder at the same level as the dist folder. Within the src folder add a file tailwind.pcss. Add the tailwind directives as shown in the tailwind docs screenshot above.
Tailwind will take the original classes and configuration in the following directives: @tailwind base, @tailwind components and @tailwind utilities, which were added in the .pcss file and convert them to native CSS. Tailwind will also translate all the twig files in the templates folder with tailwind classes and compile them into the dist folder.
From the first screenshot above of the package.json file, we can see two terminal commands that we can execute to output the styles: one that compiles and re-compiles when we make changes to the .pcss file or twig files (useful for development), and another to compile and minify the files (for production). In package.json file:
"scripts": {
"dev": "npx tailwindcss --input src/tailwind.pcss --output dist/tailwind.css --watch",
"build": "npx tailwindcss --input src/tailwind.pcss --output dist/tailwind.css --minify"
},
In your terminal in the theme folder where the package.json file is located, run npm run dev which will compile and subsequently watch your Tailwind styles, map them to the directives, output them to the native CSS file in the dist folder which gets added to your site via the libraries.yml file.
Using Custom Fonts with Tailwind and Drupal custom theme
I tried a lot of different approaches and managed to get the fonts to display in the browser after trial and error- this may help or it could be inappropriate for your use case.
I downloaded .woff and .woff2 files from this site.
Created a fonts folder at the same level as dist and src folders. Place the font files in this fonts folder.
In tailwind.config.js file, extend these font names on top of the default tailwind font stack (lines 11 to 14 below):
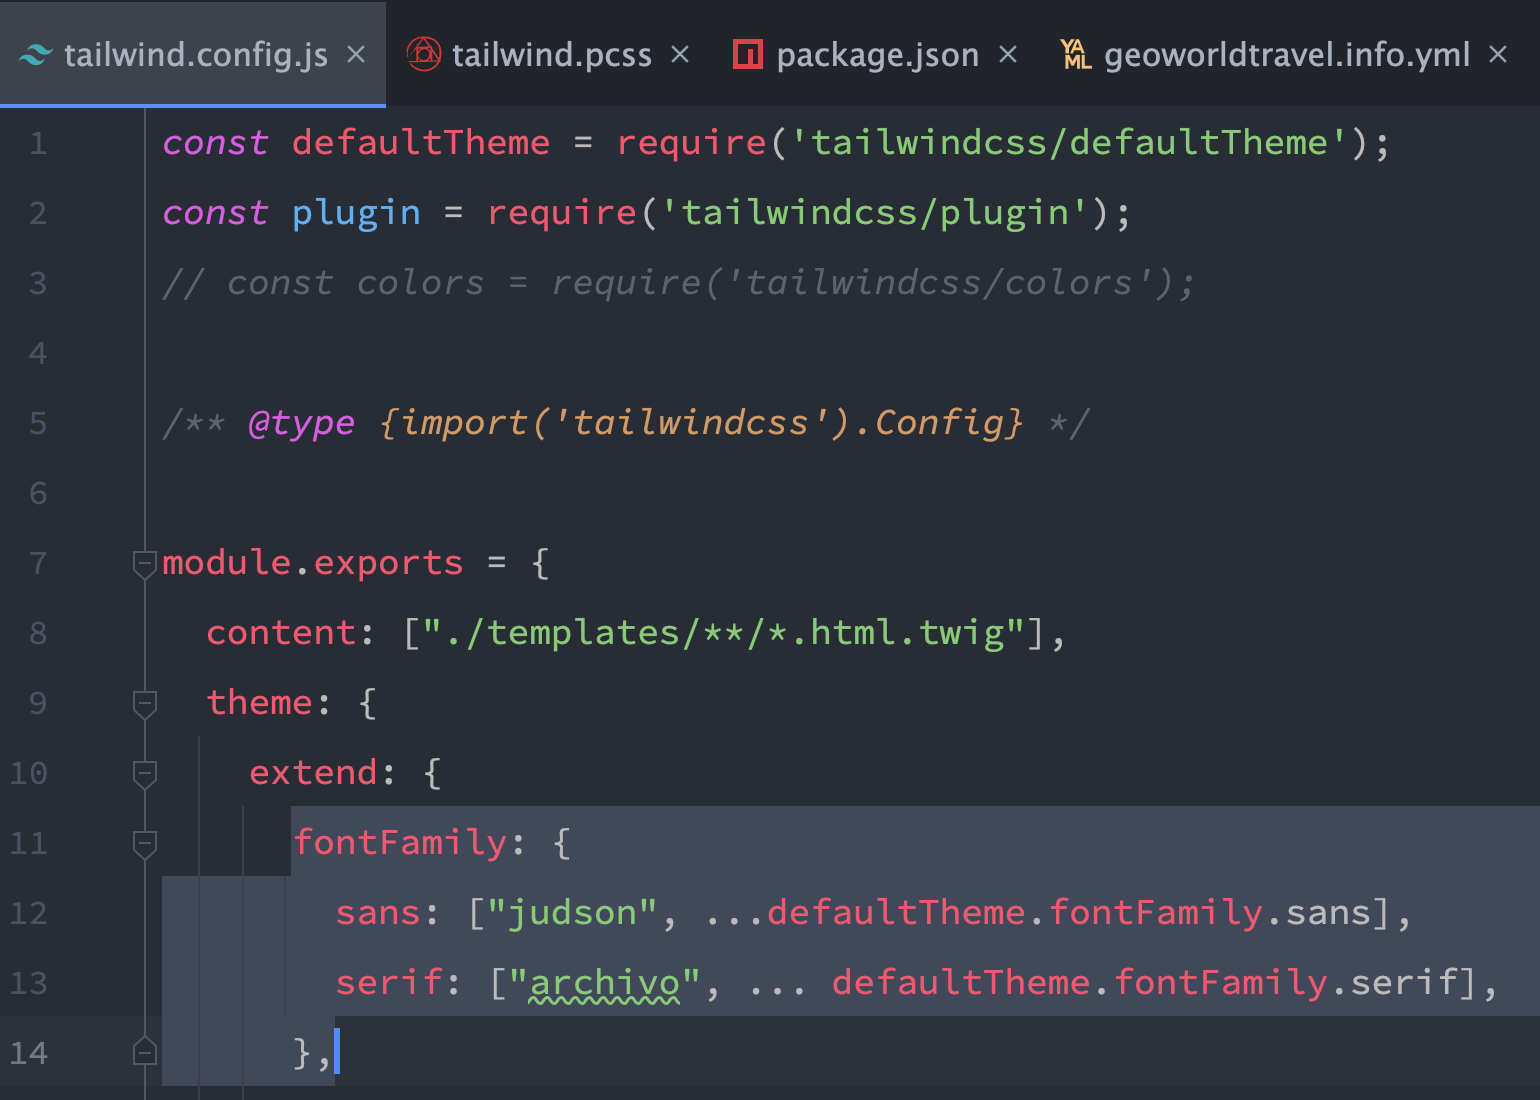
The two custom fonts are "judson" and "archivo". You could overwrite them by not placing them within the theme.extend object, but should the custom fonts not load, then the browser will default to the next available system font in the stack which seems appropriate.
In the .pcss file, use the @font-face rule to include the fonts so tailwind knows where the files are. Again, I've assigned the Tailwind base layer so they should apply globally:
@layer base { @font-face { font-family: "judson"; src: url('../fonts/judson-regular.woff') format('woff'), url('../fonts/judson-regular.woff2') format('woff2'); font-display: swap; } @font-face { font-family: "archivo"; src: url('../fonts/archivo-regular.woff') format('woff'), url('../fonts/archivo-regular.woff2') format('woff2'); font-display: swap; }@font-face {font-family: "archivo"; src: url('../fonts/archivo-700.woff') format('woff'), url('../fonts/archivo-700.woff2') format('woff2'); font-weight: 700; font-display: swap;
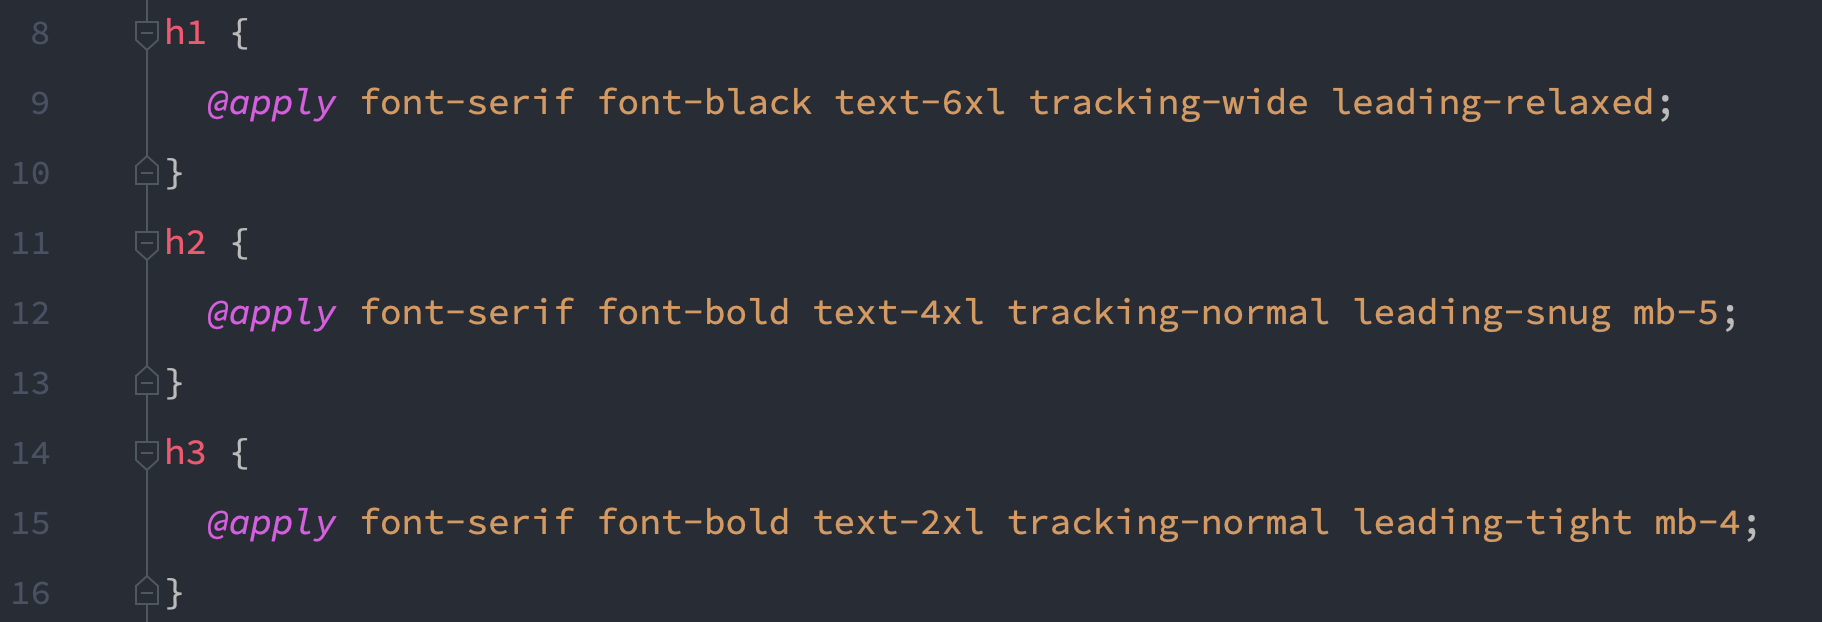
}Staying in the .pcss file, we can test whether the fonts get pulled through correctly. I grabbed all the heading tags with @apply and assigned the font-serif property which in the screenshot above, has now included the "archivo" typeface:
Likewise, you could set the body copy font-family to accept the font-sans property:
body { @apply font-sans font-black font-medium tracking-normal leading-tight }
If the steps didn't work for you, I suggest you do what I did to get it to work and that was patiently trawling through Tailwind video tutorials, Google, SO searches.


